Showing posts with label repurpose. Show all posts

Monday, May 14, 2012

Egg Shell Tea for the Garden

Brad and I have been composting for about 9 months now (something that I keep meaning to write a post on, it will come soon).  At first we put egg shells in along with our other food scraps, but lately we have found a better use for them.  I know that putting egg shells in your compost is great, but it drives me crazy how they never ever ever seem to break down.  For a while we went back to throwing them in the regular garbage, but I felt guilty about that.  Now we get the nutrients in a faster process.  I present to you, egg shell tea.

Just kidding.  But it is similar.

We crush and rinse the egg shells to make sure all the egg white is off of them.  Then we soak the egg shells in water for 2-3 days usually.  Then we use that water to water our plants.  I use it particularly for the spider plant, but also for the pot of spinach we are growing outside.  I have noticed a big growth spurt specifically in our spider plant since I began to water with the "egg shell tea."

Egg shells contain water soluble nutrients such as calcium, potassium, and phosphorus.  Soaking the shells allows me to quickly extract these nutrients and feed them to our plants.  Egg shells are also alkaline, and thus using this water somewhat increases the pH level of the soil which is beneficial to some plants.

How do you use egg shells?

Thursday, February 9, 2012

Chalkboard Organization

As we have been working to eliminate plastics and become more repurposeful in our house, we have been collecting jars for storage.  Between washing and keeping emptied ones and being given many from my generous mother-in-law, our fridge and pantry are full of them.  The only problem we were running into once not being able to tell the difference between steel cut oats and rolled oats, baking soda and baking powder, etc.  Our solution (inspired by a pin on Pinterest) is chalkboard paint.


Simple to do, looks awesome, and is reusable!

How do you keep your kitchen organized?

Thursday, December 8, 2011

Rake Repurpose: Necklace Hanger

Wow, Thursday really snuck up on me this week.  As such, I had not yet written my next blog for the Eco Christmas series.  This will be an interim post on a simple repurposing project Brad and I did.

We were given an old bow rake for when we tried to plant some grass seed in our little patch of yard last spring.  I believe it only took one use before the head came off the old wooden handle.  It sat around outside for a very long time, but I thought it looked cool so I just couldn't get rid of it yet.

Then I noticed metal bow rake heads popping up on Pinterest with jewelry, scarves, wine glasses, keys, and the like hanging from them.  Since I had given away my much-too-fancy-for-my-taste stand up jewelry box, I thought this could be the perfect solution to my new necklace carrying needs.


And it is!  I thought about cleaning the rake head first, but I decided I liked the worn, rustic look.  All I had to do was have Brad stick a nail in the wall and hang it up.  As you can see, I don't have a lot of jewelry (oh, and the pocket watch is not mine), and I like the simplicity of it, as well as the ease with which I can find the piece I am looking for.

What unlikely items have you repurposed?

Monday, November 14, 2011

Menu Making

As part of the Healthy Homemaking series I had done a post on meal planning.  To be completely honest, we have not kept up with it.   One way we thought we could make it more concrete was to make a menu to display in the kitchen.  After seeing ideas on Pinterest, this is what we made.  It's so quick and simple, plus we didn't have to buy a single thing.


What you need:
-picture frame with glass
-paper
-paint (optional)
-dry erase pen

1. Cut paper to required dimensions to fit inside frame.
2. Print title and days of the week onto paper either through a computer printer or by hand.
3. Paint frame if desired.
4. Put paper in frame.
5. Write on glass with a dry erase marker.

While going through and getting rid of most of our possessions, we found a few unused picture frames, so this was as great opportunity to repurpose one.  The paper is leftover from when I used to make cards and scrapbook.  The frame was originally black, which I didn't think suited our style or house, so Brad painted it brown with acrylic paint.

We still work hard to meal plan each week, but having the menu sitting in the kitchen staring at me makes me think about it and helps me remember to do it.

Do you meal plan?  What strategies to do you use?

Thursday, August 25, 2011

Healthy Homemaking Series: Repurposing

Baby Step 14 - Creative Repurposing

Challenge: Find a way to repurpose an item you would normally throw out.

Why: Repurposing is good for the wallet as well as the environment.  Reusing items cuts down on waste, unnecessary purchases, and ensures that everything is used to its full potential.

How:  This is something I struggle with.  I have a hard time thinking creatively to begin with, let alone thinking so far outside of the box as to come up with additional uses for items that I have been led to believe have only one purpose.  I had to really think to do this challenge, which made it a real challenge for me.  Here is what I came up with.

Fabric Softener Sheets for Freshness

After discovering The Wonders of Vinegar in a previous challenge, I have been avidly using white vinegar in my washing machine as a fabric softener and static reducer.  I thought to myself, "What will I do with all these fabric softener sheets now?"  I was tempted to throw them away, so I am glad this challenge came along to stop me.  They are perfect to stuff into shoes, drawers, or on clothes hangers to keep your articles fresh.

Toothbrush for Lint

After a good teeth cleaning at the dentist, I received a new toothbrush.  My previous toothbrush wasn't really worn out yet, but that is obviously something you can't give away.  Luckily I remembered the mug of toothbrushes my mother always kept in the laundry room.  They are the easiest tool for removing lint from the dryer lint screen, cleaning off my reusable dusting mitt and dry mop pad (as seen here) between washes or scrubbing in stain remover on clothing.

 Cards into Gift Tags

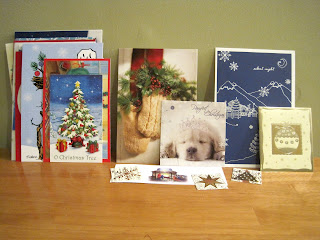
I never save cards.  I am not sentimental and rarely have emotional attachments to objects.  That is why I decided to cut up the Christmas cards I received last year to make gift tags for the presents I am giving away this year.  They're cute, festive, and good for the environment.

Anther two ideas I have mentioned in earlier posts are saving emptied jars to use for food storage and using newspaper as gift wrap.

What items have you repurposed?

Sunday, July 3, 2011

Lost My Marbles

Another birthday is coming up, and thus another homemade present had to be thought of and created.  This one is for an older woman, so Brad and I thought jewelry might be nice.  I look around on the internet and discovered "fried marbles."  I thought it would look best on a necklace.

To make a Fried Marble Necklace you will need:
-marbles
-approx 17 gauge wire
-glass/metal/some sort of strong glue
-necklace chain or cord
-frying pan/toaster oven
-pliers

Marbles in the frying pan.  I will be honest with you guys though, this did not work for us.  We couldn't get them hot enough and heated all throughout.  We ended up putting them in the toaster oven at 450° F for as long as you're willing to wait (at least 20 minutes).  Move around occasionally.

As quickly as possible, move marble from pan into ice water.  This is what causes the pretty cracking inside.

Using pliers, make a small loop of the wire around the necklace chain.  Then work around the loop to form a spiral as big as desired.  We used steel wire.  For a more polished look, use sterling silver wire.

Gently pull the wire down away from the loop to form a dome shape.  You can also make more elaborate cages for the marble.  There are plenty of tutorials on the internet if you're interested.

Glue the marble into the cap, and allow to dry.  We used Amazing Goop's Craft Contact Adhesive which "glues whatever, bonds forever."

And there you have it!  Looks pretty doesn't it?

Sunday, May 15, 2011

Make Your Mark

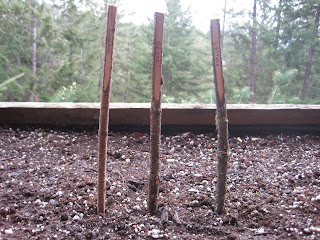
This was a big gardening week for Brad and I.  We began planting in our own little garden at home, then had a nearly a full day of gardening in a huge garden a group of us are working on together at our friends' house.  For our home garden, we made our own garden markers, and here's how we (well, Brad) did it.

Begin with cut branches.

Shave bark off one section at the top.

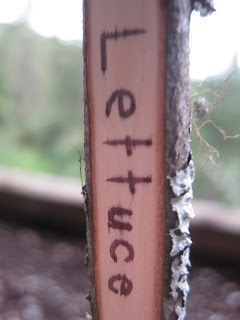
Print names of garden items.

Place in the garden.

 Ta da!

They were so simple and quick to make, not to mention free.  Plus, I really love the natural look they have in the garden.

PS - As I mentioned, our home garden has begun.  We decided to plant zucchini, green beans, lettuce, peas, and snow peas.  We were quite limited in our options since we get very little sunlight.  It turned out well though as those are some of my favourite vegetables.  Oh, and they're mostly organic!


Sunday, May 1, 2011

Hang In There

Another birthday was upon us in April, this time for my father in law.  I don't know about all of you, but I have a really hard time coming up with homemade gifts for men.  This took some extra time and research to find a great gift, and I think it worked out well.  Here is how to make your very own belt rack.

Drill equally spaced holes into the bar of a wooden coat hanger.
Measure the width of the bar and be sure to cut off the excess of the screw so it doesn't poke through the top.  Hopefully you have something sharper than we did to do this.
Gently screw the hooks into the holes.  Take extra care to prevent the wood from splitting or the screws from poking through.

 Hang it in your closet and hang up your belts.  There you  have it!

As you can see, Brad did most of the work for this one.  We were happy with the end result, and I believe the birthday boy was also.  He told us the very next day that his belts were hung up and it worked well.  To customize this you could hang up as few or as many hooks of whatever size you like.  It could also be painted or decorated.  I bet it would even work well as a tie or scarf rack too.  If you need a little organization in your closet, this is a great do it yourself solution.

Monday, January 31, 2011

Black and White and Read All Over

A practice that Brad and I started up just before this Christmas is wrapping our presents with newspaper.  We've thought about it before and done it sometimes, but now we are committed.  The main purpose is to give the newspaper another purpose before getting tossed in the recycling bin, but an often overlooked advantage is that it's free!  My favourite is to match the newspaper article on the paper to the person I am giving the gift to.  Here's an example.

Present for a friend's bachelorette party, hence the wedding ad.

As you can see there, the gift can still be dressed up with ribbon, bows, etc.  I like to use twine and natural elements.  Another idea is to use the "fun" sections of the paper such as the comics or the crossword.  The only thing to be careful of is the black ink left all over your hands.  Newspaper is thick, tough, folds well, eco-friendly, and my wrapping paper of choice.

Saturday, January 22, 2011

Keeping Vinyl Alive

Happy birthday goes out to a great friend of mine and Brad's today!  My post will be about the birthday present that we made him, vinyl record bowls!  It was surprisingly quick and simple to do, and everyone seemed to love them.  Here's how we did it.

Place record on an upside down bowl (oven safe) on a cookie sheet and place in oven preheated to 225°F.

Take out when it begins to melt, approximately 3 minutes.

Place inside of a 10" bowl and quickly shape.  Hold until cooled, about 30 seconds.

Upcycled!

We had made a set of 4 with the purpose of being snack bowls for movie nights in mind, but after they were opened, everyone brainstormed many more ideas for their usage, such as a holder for your keys and wallet by the door. With near limitless potential, these vinyl record bowls were a hit!