Showing posts with label gift. Show all posts

Monday, February 20, 2012

Herbal Fire Starters

On Whole Living's website they have a list of 25 Eco-Chic Ideas for Your Home.  Most of them are really fantastic, and I encourage you to check them out.  One that caught my eye was the herbal fire starter.  I thought this would be especially relevant for a winter post because I am sure some of you heat your homes with wood fires or have them occasionally as a treat.

Herbal Fire Starters
To make:  Bundle combinations of herbs and small pine cones in newspaper.  Tie ends with twine/raffia/hemp, etc.
To use: Place one fire starter underneath the log pile with ends sticking out.  Light newspaper end on fire.

We put ours in groups of cinnamon with sage and lavender with rosemary then secured them with hemp.

Herbal fire starters are a natural alternative to lighter fluid.  They also add a wonderful aromatic aspect to the fire.  Putting the bundles together was actually a lot of fun as well.  Brad and I made most of these as a gift for an outdoorsy friend and also a few for ourselves to enjoy this summer out at our fire pit or while camping.

As a side note, I want to briefly mention that wood fires do quite significant damage to the environment.  I encourage those who enjoy the warmth and coziness of a fire to look into composite logs.  There are many options made from clean burning renewable resources.

What is an eco-chic idea you've implemented in your home?

Monday, December 5, 2011

Eco-Christmas Series: Green Giving

Christmas spending and giving has been around since the Three Wise Men visited Jesus and present their gifts of frankincense, myrrh, and gold.  Gift giving and generosity are wonderful, but I think it is important to be mindful especially at this time of year when we have a tendency to get carried away.  Think about your personal values and work towards having those coincide with purchases.  Here are some options to consider.

I've moved to a new website! Head on over to Heartful Habits for the full post. Thanks!

Sunday, July 3, 2011

Lost My Marbles

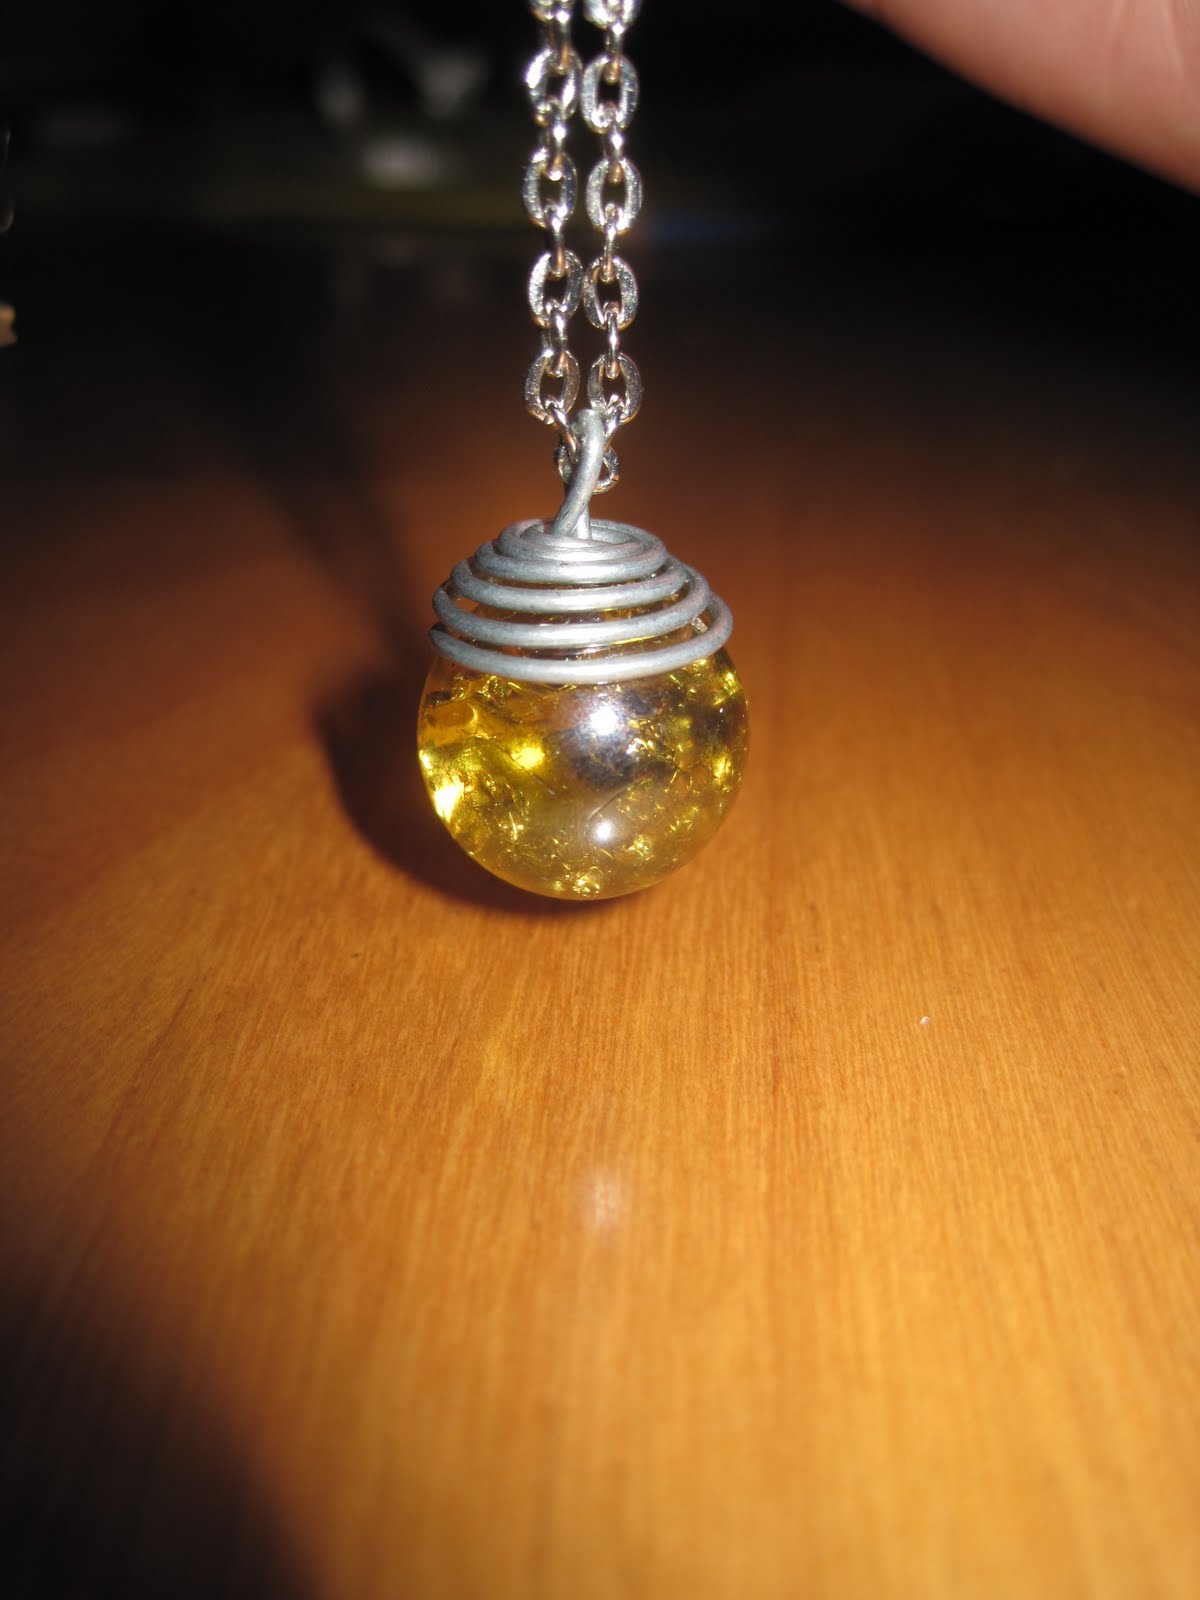
Another birthday is coming up, and thus another homemade present had to be thought of and created.  This one is for an older woman, so Brad and I thought jewelry might be nice.  I look around on the internet and discovered "fried marbles."  I thought it would look best on a necklace.

To make a Fried Marble Necklace you will need:
-marbles
-approx 17 gauge wire
-glass/metal/some sort of strong glue
-necklace chain or cord
-frying pan/toaster oven
-pliers

Marbles in the frying pan.  I will be honest with you guys though, this did not work for us.  We couldn't get them hot enough and heated all throughout.  We ended up putting them in the toaster oven at 450° F for as long as you're willing to wait (at least 20 minutes).  Move around occasionally.

As quickly as possible, move marble from pan into ice water.  This is what causes the pretty cracking inside.

Using pliers, make a small loop of the wire around the necklace chain.  Then work around the loop to form a spiral as big as desired.  We used steel wire.  For a more polished look, use sterling silver wire.

Gently pull the wire down away from the loop to form a dome shape.  You can also make more elaborate cages for the marble.  There are plenty of tutorials on the internet if you're interested.

Glue the marble into the cap, and allow to dry.  We used Amazing Goop's Craft Contact Adhesive which "glues whatever, bonds forever."

And there you have it!  Looks pretty doesn't it?

Sunday, June 12, 2011

It's the Thought That Counts

As of this year, Brad and I have begun changing the way we think about gifts, especially for one another.  If we actually need something, we buy it if we can throughout the year, and we don't see the use as much anymore in having a lot of "things" just for the sake of buying each other a gift.  This is part of why we have begun opting a lot more for homemade gifts, as you know, and even donation gifts.  We hear about it more it seems at Christmas, but there are so many great organizations that have gift catalogues or online donations you can make in someone's honour all year around.  From World Vision to Care Canada to Heifer International to Free the Children to the World Wildlife Fund, there are options for most anyone.

One organization that really stood out to me is Changing the Present.  I love their name, and the website is great.  You can browse through all sorts of different causes, the categories including basic needs, community, environment, heath and safety, and opportunity, to find one that will be meaningful to your particular recipient.  They are even divided up into price ranges, recipients, and occasions.  Prices start at just $1!  You can check out some of my favourite causes here.

Since Brad is into technology and saving the environment, I chose a related gift for him as a graduation present.  (He just graduated from UBC-O with his Bachelor of Science. I'm so proud!)  His gift was installing a solar cell for arrays on the roofs of apartment buildings with the nonprofit organization Stewards of Affordable Housing for the Future.


I think these are great gift ideas for the person who has everything or people who are particularly passionate about a certain cause.  It's also a way to reduce consumerism and consumption of "things" and "stuff" we don't really need and help others and our planet.

Tuesday, May 17, 2011

You Can't Have Your Cake and Eat It Too

This spring has been full of new arrivals.  At a baby shower last weekend, a friend and I decided we want to make our gift.  I scoured the internet for homemade shower gifts.  The one that caught my eye was a diaper cake.  I had never heard of one before, but apparently everyone else has.  Regardless, this is how we made ours.

The finished product!  Our earthy, natural themed diaper cake.

Sorry I didn't take more pictures.  I thought it was going to be a lot harder than it was.  Turns out it was really simple, so I think most anyone could do it just from the directions anyways.

You will need:
-a pack of diapers (we used an 84 pack and had quite a few left over)
-as many cake pans as tiers you want in different sizes
-fishing wire/string/large rubber bands
-some sort of cake tray
-decorations

Directions:
1. Place a handful of the diapers inside the first cake pan.
2. Fan the diapers along the side of the cake pan, adding more diapers until it is full.
3. Tie fishing wire/string/use a rubber band around the diapers to secure them.
4. Continue steps 1-3 with any other tiers.  For larger tiers, you may need to roll up diapers to place in the centre to keep it solid.
5. Flip the cake pans over and lift off the diapers.
6. Stack the tiers and decorate.  We wanted a natural themed diaper cake for a baby boy, so we used twine and tissue paper colours that matched.  Other options would be ribbon, bows, cellophane or small gifts such as bottles, soothers, or bibs.


It was a real hit at the shower, and we think the mother-to-be liked it as well.  If you want a great looking, handmade gift, try it out!

Sunday, May 1, 2011

Hang In There

Another birthday was upon us in April, this time for my father in law.  I don't know about all of you, but I have a really hard time coming up with homemade gifts for men.  This took some extra time and research to find a great gift, and I think it worked out well.  Here is how to make your very own belt rack.

Drill equally spaced holes into the bar of a wooden coat hanger.
Measure the width of the bar and be sure to cut off the excess of the screw so it doesn't poke through the top.  Hopefully you have something sharper than we did to do this.
Gently screw the hooks into the holes.  Take extra care to prevent the wood from splitting or the screws from poking through.

 Hang it in your closet and hang up your belts.  There you  have it!

As you can see, Brad did most of the work for this one.  We were happy with the end result, and I believe the birthday boy was also.  He told us the very next day that his belts were hung up and it worked well.  To customize this you could hang up as few or as many hooks of whatever size you like.  It could also be painted or decorated.  I bet it would even work well as a tie or scarf rack too.  If you need a little organization in your closet, this is a great do it yourself solution.

Saturday, January 22, 2011

Keeping Vinyl Alive

Happy birthday goes out to a great friend of mine and Brad's today!  My post will be about the birthday present that we made him, vinyl record bowls!  It was surprisingly quick and simple to do, and everyone seemed to love them.  Here's how we did it.

Place record on an upside down bowl (oven safe) on a cookie sheet and place in oven preheated to 225°F.

Take out when it begins to melt, approximately 3 minutes.

Place inside of a 10" bowl and quickly shape.  Hold until cooled, about 30 seconds.

Upcycled!

We had made a set of 4 with the purpose of being snack bowls for movie nights in mind, but after they were opened, everyone brainstormed many more ideas for their usage, such as a holder for your keys and wallet by the door. With near limitless potential, these vinyl record bowls were a hit!